The Cheap and Dirty Foucault Tester
Mark II
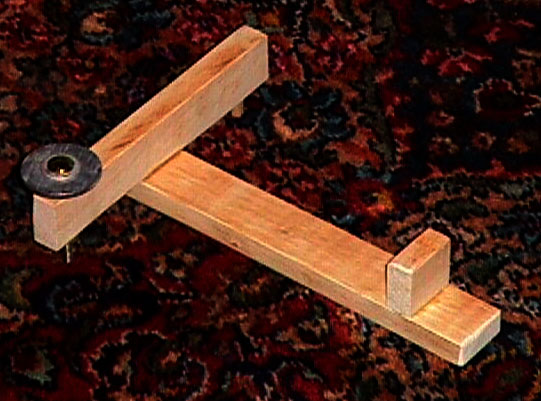
To evaluate the figure of the mirror I'm grinding, I decided to build a little tester.
I essentially took the design from Texereau and built a cheap and dirty version.
It ain't pretty but it does work.
You don't want to know about the Mark I. It was so bad, I didn't even finish it :-)
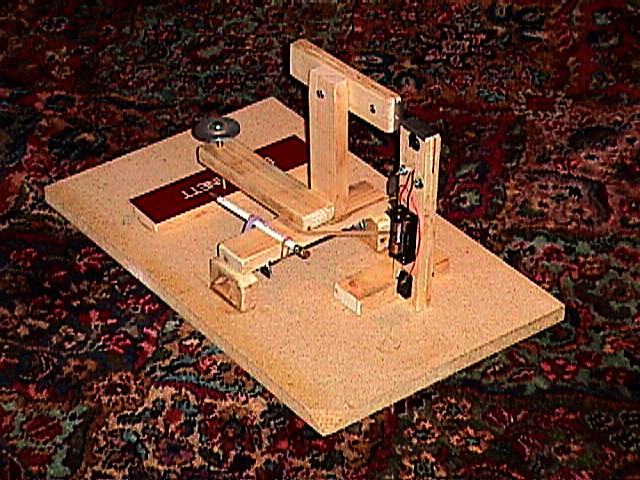
The Mark III is much improved from the Mark II. But its essential design remains the same.
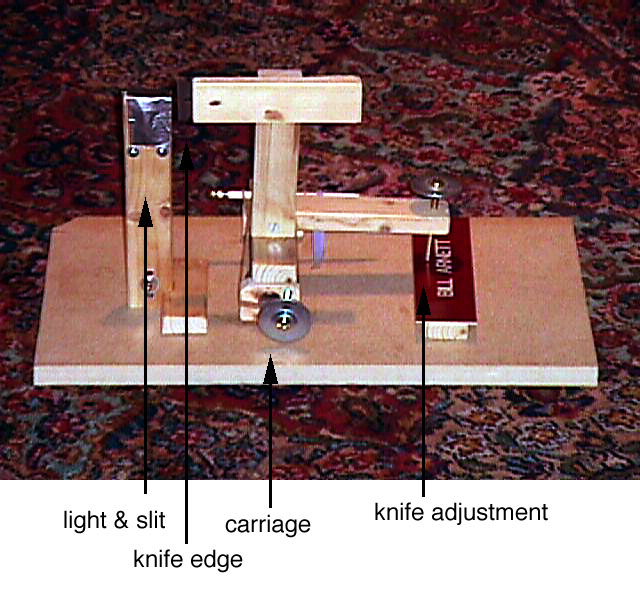
The base is just a piece of an old particle board shelf; the rest of the wooden parts are cut from a
1x2 nailing strip.
The carriage runs on a huge nail I had bought to hold down the astroturf on my temporary observing site but they weren't needed so...
Texereau's design calls for a spring to pull the carriage against its adjuster but I just used a rubber band. His design calls for a piece of glass under the knife adjustment but I used an old name plate from my office cubicle several jobs ago. Texereau calls for a 1 pound lead weight to hold the carriage down but I just used another rubber band held with a pencil.
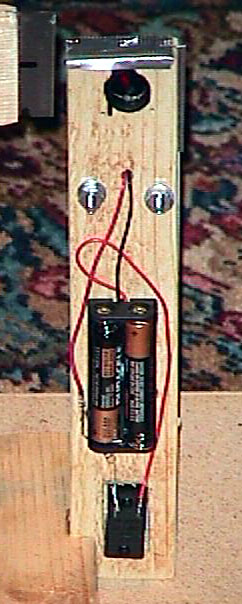
I had to buy the battery holder and switch but I did have a couple of LEDs lying around.
And yes, it uses duct tape (to hide the back side of the LED).
 The wooden 1x2 is split and two razor blades inserted to make the slit. The slit is adjusted by loosening the screws and nudging the razor blades.
The hole on the other side is smaller so that it holds the LED firmly and reduces the vertical extent
of the slit to about 1/4 inch.
I resisted the temptation to use the screws to connect the LED on the other side :-)
The wooden 1x2 is split and two razor blades inserted to make the slit. The slit is adjusted by loosening the screws and nudging the razor blades.
The hole on the other side is smaller so that it holds the LED firmly and reduces the vertical extent
of the slit to about 1/4 inch.
I resisted the temptation to use the screws to connect the LED on the other side :-)
I blackened the inside of the hole to cut down on stray light.
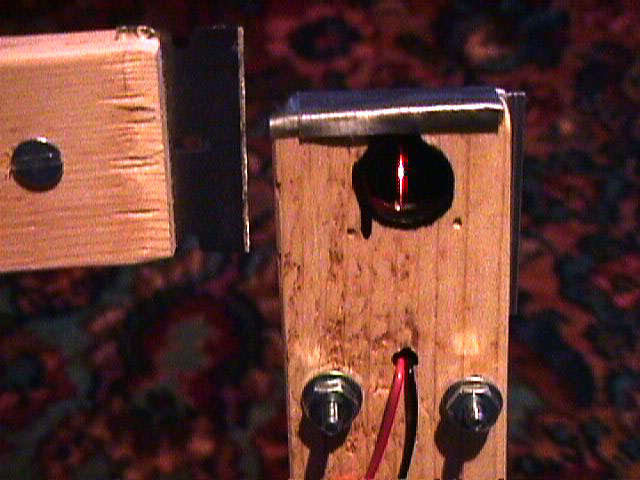
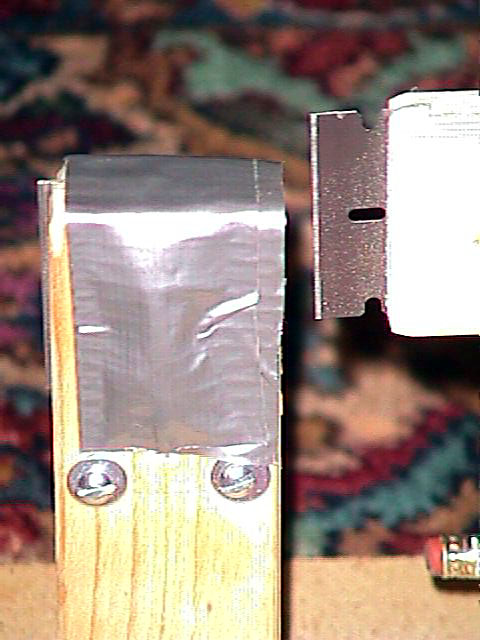 This is where you put your eye. Not as dangerous as it looks.
Duct tape kills stray light from the back side of the LED.
This is where you put your eye. Not as dangerous as it looks.
Duct tape kills stray light from the back side of the LED.
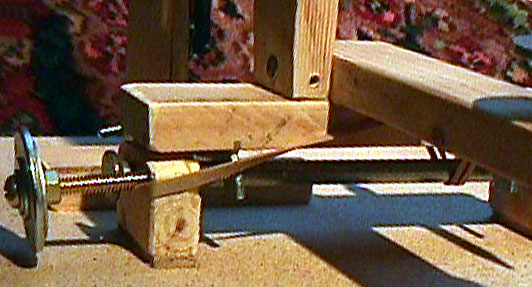
The carriage is supported on the big nail by two half-washers and held back by the rubber band.
The knob adjusts the position of the carriage.
I'm not too good a drilling straight, am I?
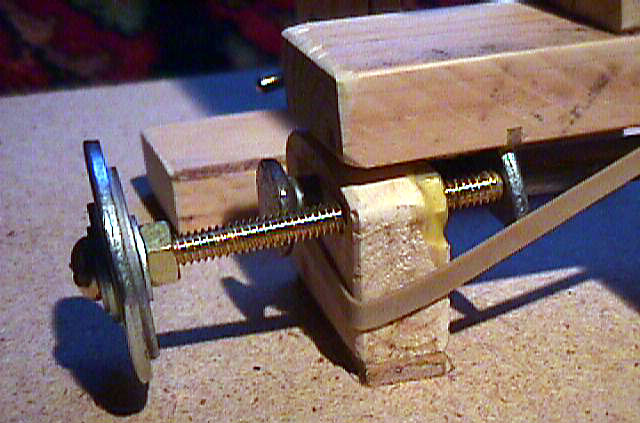
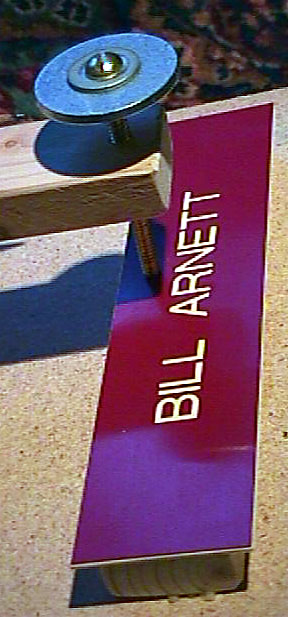 This adjusts the position of the knife and makes sure I don't get my tester mixed up with someone else's.
Of course, you also need a way to hold the mirror in place and adjust it a little:
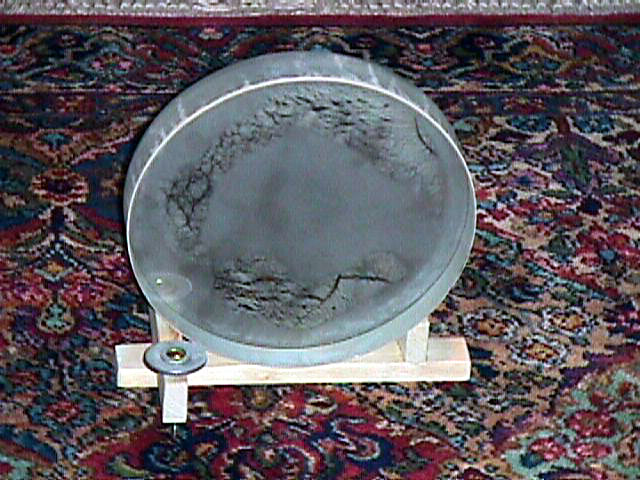
I don't really use it one the floor but the carpet makes a better photograph background than my workshop :-)

If I were doing this again I would change a few things (without
sacrificing the cheap and dirty quality of the project :-) First, I
would make the arm the holds the knife adjuster longer. This would
take more turns of the screw to move the knife a given distance making
it easier to adjust finely. Second, I would make the carriage
supports a little bigger so there's more room for the carriage
adjuster screw. And, I would make the carriage support a little longer so it has more travel.
Of course, to be really useful a way to measure relative positions
of the carriage is necessary. This can be done with a scale on the
carriage itself plus markings on the carriage adjuster knob.
After a little experience with it some other faults became clear:
- the carriage doesn't run true enough. The washers move too
easily in perpendicularly to the nail. This can probably be fixed by
filing V-shaped grooves in the washers.
- the light source
needs a diffuser and probably a slightly larger resister.
- the carriage adjuster is at so much of an angle to the carriage that it
will introduce inaccuracies that must be compensated for if
measurements are to be made
- a piece of teflon under the knife adjuster would help reduce friction.
- the razor blade for the knife edge is a little dangerous. It would be easy to split the
board that holds it and drill a hole to view thru.
- the mirror holder needs rubber feet to keep it from slipping too easily.
- it is a real pain to align the tester with the mirror, especially if the room is not dark. A little holder for a laser pointer would probably do the trick.
Most of these problems have been addressed with the Mark III version.
Bill Arnett; last updated:
1999 Mar 1